
Home --> How To Guides
Okinawa Ridge electric scooter retrofitted with PureLithium battery
Written By: Kamlesh Mallick & Atul Gopal
Introduction
Learn how to replace the lead acid battery in your Okinawa Ridge electric scooter with a Lithium-Ion battery with this battery replacement guide. The Okinawa Ridge can support Lithium based batteries that operates at a voltage of 60V.
Tools
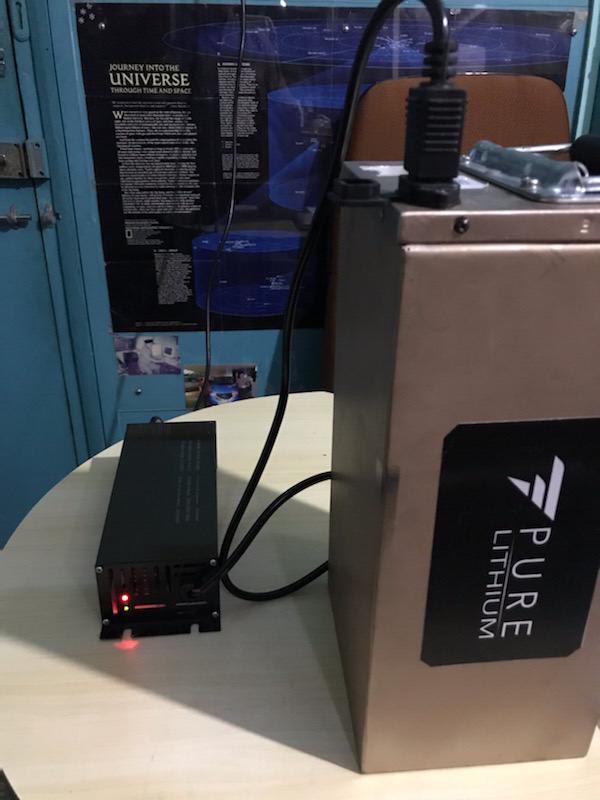
- Star ScrewDriver & Spanner to remove original lead acid battery
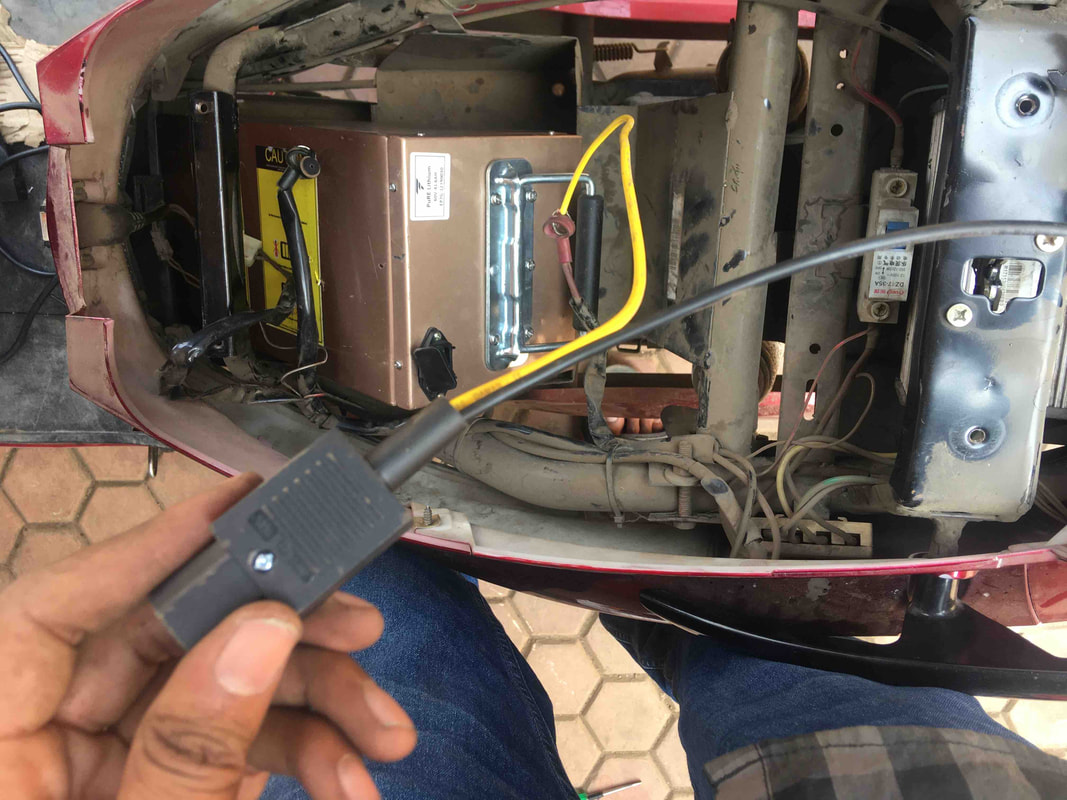
- 35 Amp rated Discharge Connector that goes into the Battery
- Multi Meter to measure the Positive and Negative nodes of the PureEV Lithium Battery
- Soldering Iron Kit to connect the Okinava Ridge controller with the PureEV Battery
- Duct Tape
Choosing the battery pack - PureLithium Battery
|
Choosing a Lithium battery is most important aspect of any conversion. Ensure that the battery you use is a certified battery to be used in Indian conditions. For this conversion we use a Made In India battery by PureLithium, a startup based in Hyderabad.
The battery can store 2.5 kWh worth of energy and is the same battery used in the ePluto 7G electric scooter also made by PureEV. You can watch our battery review video to understand more about the battery, the BMS etc. We also did a range test. Check minimum requirements to use the Pure Lithium 2.5 kWh Battery
The Okinawa Ridge meets all the above conditions. It has a 60V system, the controller is rated at 30 Amps. The peak power of the motor is around 1.2 kW. Thus the PureLithium 2.5 kWh Battery can be used for this conversion. If you want to use a battery from another manufacturer, please ensure the battery is certified and also find out the minimum requirements of the battery pack from the battery manufacturer before installing it on the Okinawa Ridge Electric Scooter. Here are some details of the PureEV battery pack 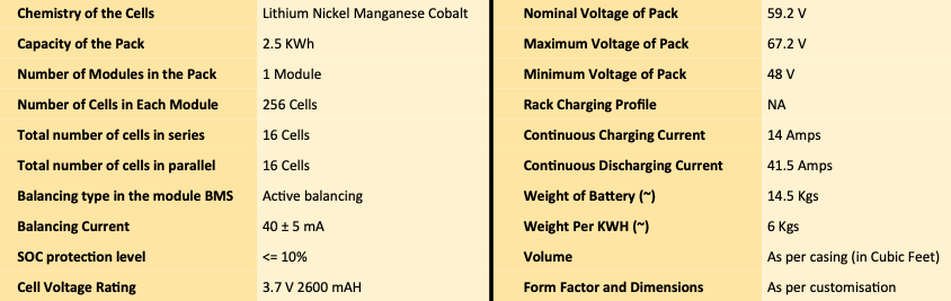
|
PureLithium 2.5 kWh Lithium battery pack
|
Video Guide
Step 1
|
|
⚡ Power off the scooter by turning off the MCB
|
Step 2
|
|
Step 3
|
|
|
Step 4
|
|
|
Step 5
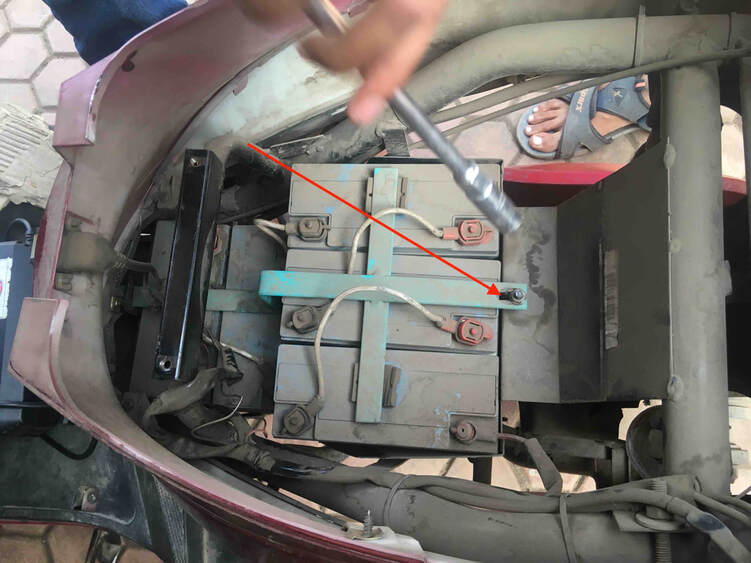
Battery in upright position
|
|
Step 6
|
|
|
Step 7
|
|
Step 8
|
|
|
Step 9
|
|
|
Step 10
|
|
🛵 Now that all connections are complete, it's time to test!
|
Step 11
|
|
|
Conclusion
While, it's perfectly possible to remove the battery, this guide assumes that the user will not remove the battery everyday and charge the battery from within the scooter.
If you have to remove the battery, just ensure the padding keeps the battery firm.
We have used the converted Okinawa Ridge with PureLithium's 2.5 kWh Lithium Ion battery for 5+ days, we found that the scooter did 122+ km and still had 2 bars remaining!
The ride was in city riding and was a combination of Eco and Sports mode.
With lots of Sports mode mixed with riding in Economy mode, we expect the scooter to go around 90 km per charge.
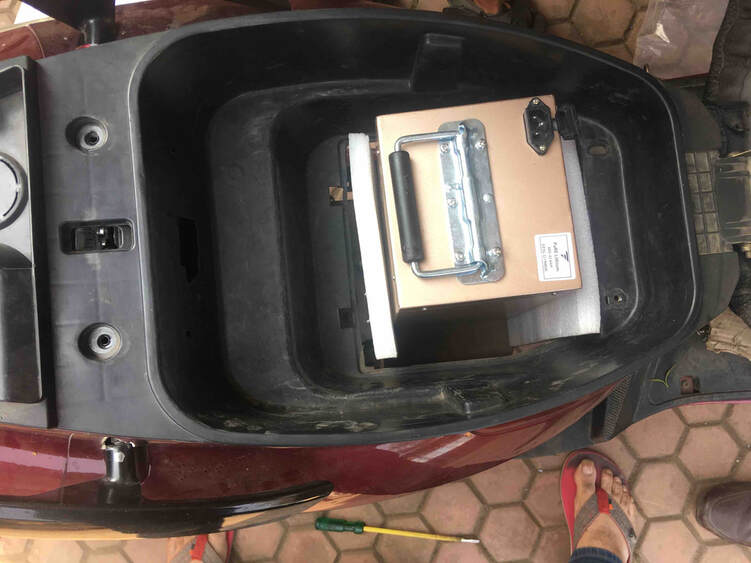
The Okinawa Ridge suddenly feels more lighter as we have replaced a heavy lead acid battery weighing 50+ kg with a lighter Lithium-Ion battery weighing 18 kg.
Overall this conversion was an interesting process and the Okinawa Ridge can be used for many years by adding a new Lithium-Ion battery.
If you have done the same conversion, and have done it better, do share your pics or comments and we shall add your suggestions in the guide.
While, it's perfectly possible to remove the battery, this guide assumes that the user will not remove the battery everyday and charge the battery from within the scooter.
If you have to remove the battery, just ensure the padding keeps the battery firm.
We have used the converted Okinawa Ridge with PureLithium's 2.5 kWh Lithium Ion battery for 5+ days, we found that the scooter did 122+ km and still had 2 bars remaining!
The ride was in city riding and was a combination of Eco and Sports mode.
With lots of Sports mode mixed with riding in Economy mode, we expect the scooter to go around 90 km per charge.
The Okinawa Ridge suddenly feels more lighter as we have replaced a heavy lead acid battery weighing 50+ kg with a lighter Lithium-Ion battery weighing 18 kg.
Overall this conversion was an interesting process and the Okinawa Ridge can be used for many years by adding a new Lithium-Ion battery.
If you have done the same conversion, and have done it better, do share your pics or comments and we shall add your suggestions in the guide.